


If you already have an agenda or event brief, you have a starting point. This guide takes you from your first prompt to a published page you can share with attendees.
Before you start
Have your event’s basic details handy: who it’s for, when and where it’s happening, and what people need to know before registering. You can also bring an existing planning document or brand PDF to give the assistant more context.
Your event starts as a draft. Publishing happens when you click Deploy, so you can review the page before it goes live.
1. Open your EpochX workspace
New to EpochX? Start free. If your team already has a workspace, ask a teammate to help you get access.
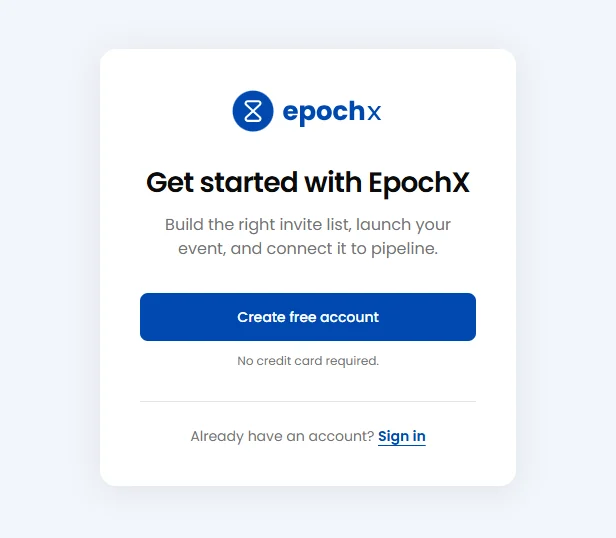
Once you’re signed in, open Events to see your team’s event list.
2. Create a new event
Click Create event in the top-right corner of the Events list.
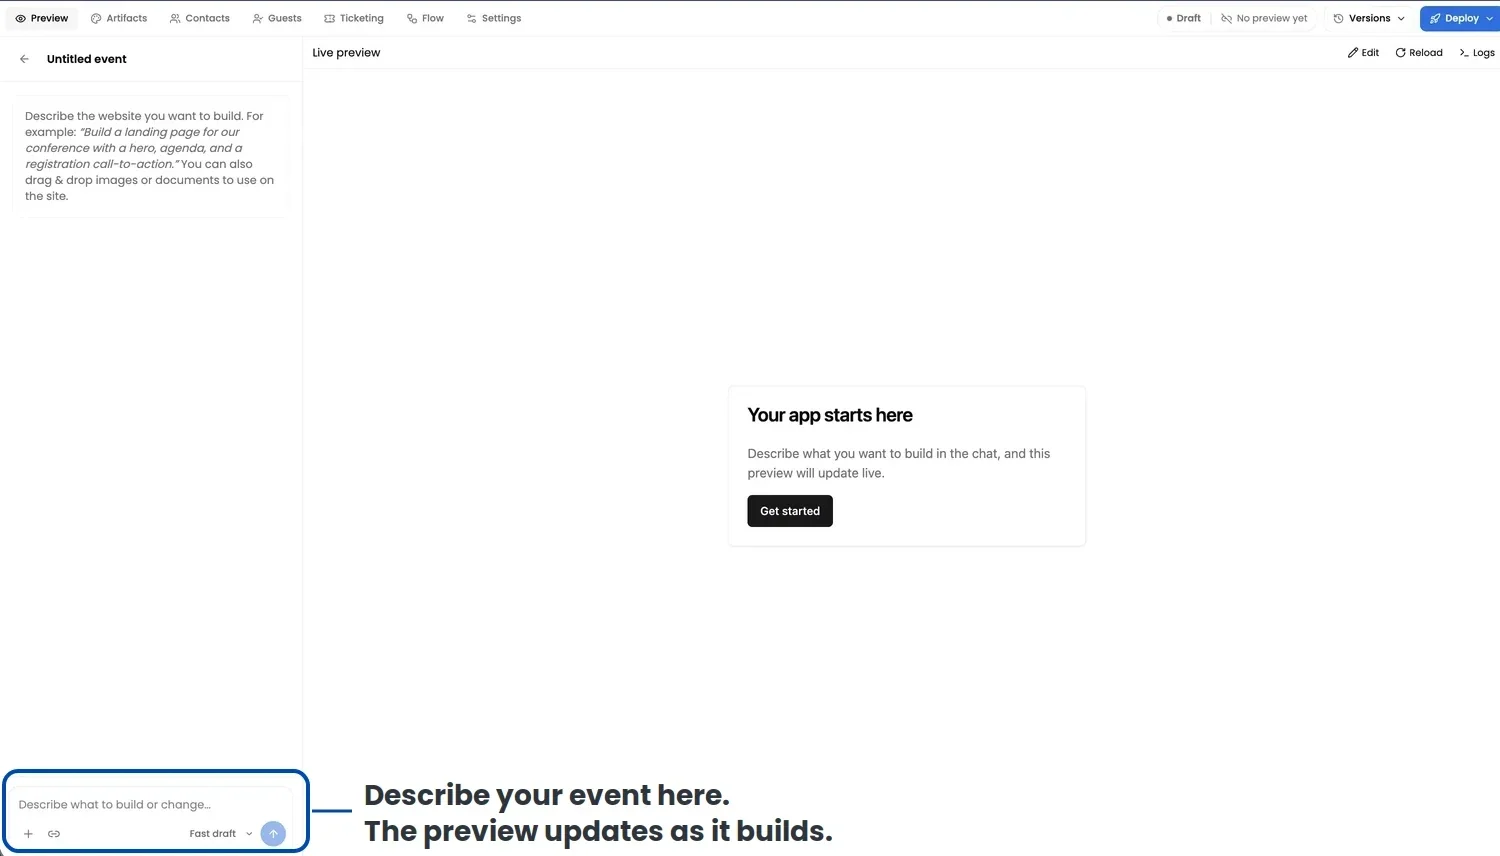
This opens the builder, with the AI assistant’s chat on the left and a preview of your event page on the right. You’ll use the chat to describe your event and request edits as the page takes shape.
3. Choose a template or describe what you need
You can start with a pre-created template or build your page from scratch. If you choose a template, use the AI assistant to customize the content and design for your event.
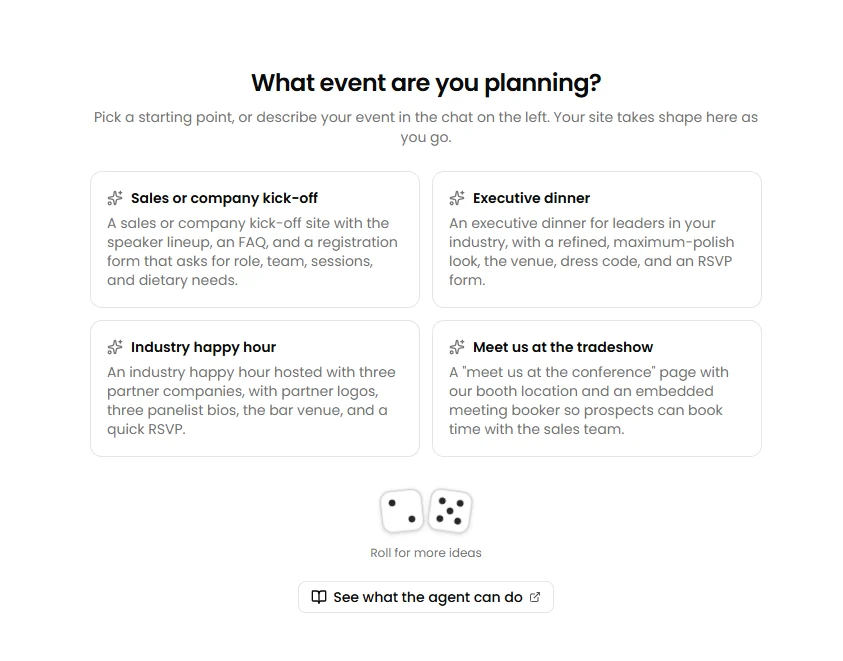
Either way, give the assistant the details you would share with a coworker: who the event is for, when and where it’s happening, and what attendees need to know.
Copy this example and replace the brackets with your own details:
Create an event registration page for a customer dinner in [city] on [date], from [start time] to [end time] [time zone].
We’re inviting [audience] to discuss [topic]. The dinner will take place at [venue and address].
Include a short introduction and this agenda: [agenda].
Add an RSVP form asking for first name, last name, work email, company, and dietary requirements. Use “Reserve your seat” for the registration button.
Keep the tone conversational and the copy concise. Leave a placeholder for any missing details.
You don’t need perfect copy to begin. Start with the information you have, then ask for changes as you review the page.
4. Add your planning files and choose a draft level
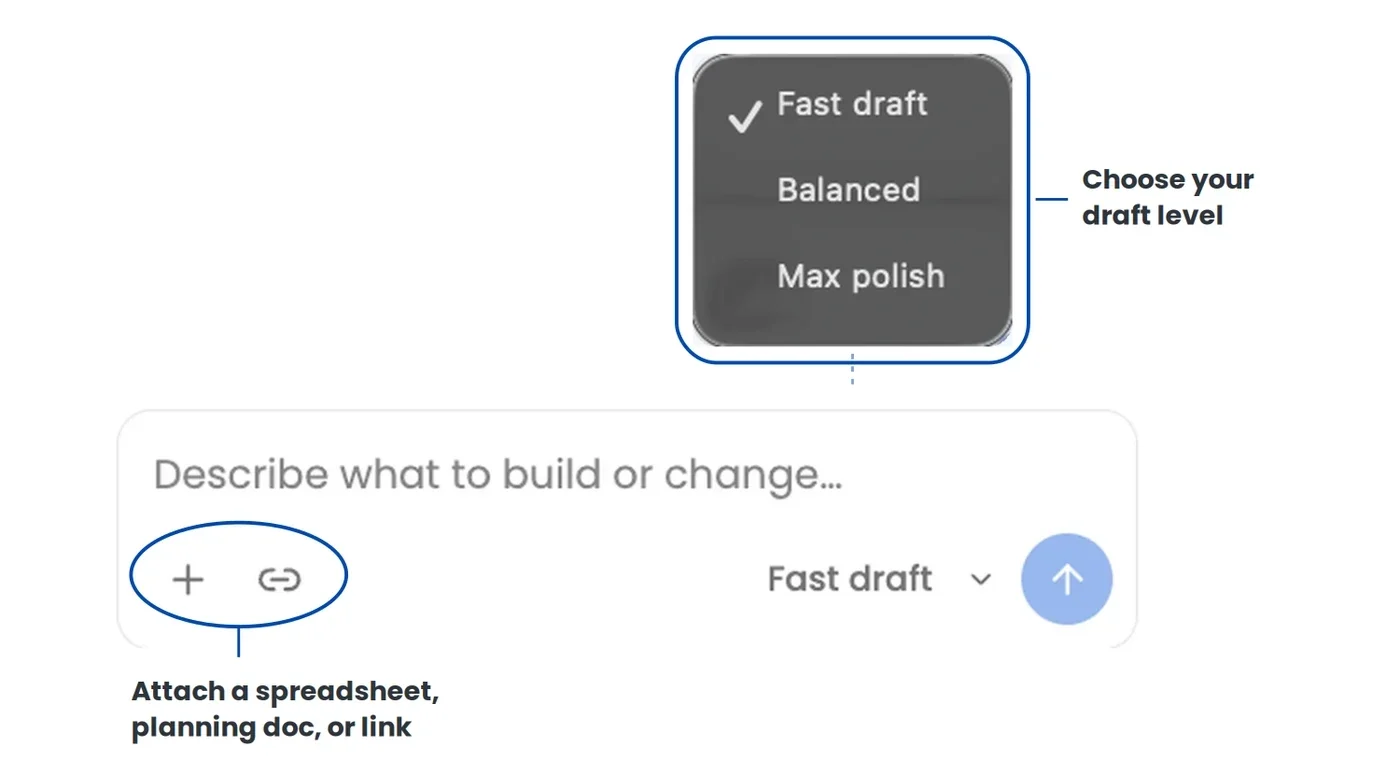
Use the + or link icon in the chat box to share supporting material. An agenda gives the assistant the actual session details to work from; a brand document provides guidance for the page’s appearance.
Tell the assistant how to use what you attach. For example:
Use the attached agenda for the event schedule and the brand PDF for colors. Keep the introduction under 80 words.
The chat box also includes Fast draft, Balanced, and Max polish options. You can switch between messages. Start with Fast draft while you work through the content, then try Max polish once the details are settled.
5. Review the page and ask for changes
Read the first draft alongside your event brief. Check the details as well as the design, especially anything you didn’t explicitly include in your prompt.
You can request changes in plain language:
Shorten the introduction to two sentences and move the agenda above the registration form.
Or make a more specific edit:
Change the registration button to “RSVP for dinner” and add the venue address below the event time.
Review the updated preview after each request. Smaller, specific changes make it easier to see whether the page is heading in the right direction.
If someone else needs to review the event, open Team in the left sidebar to manage collaboration.
6. Check the details and publish
Before publishing, give the page a final review:
- Event information: Confirm the date, start and end times, time zone, and venue address.
- Page copy: Remove placeholders and correct any details the assistant inferred.
- Registration form: Check that you’re asking for the information you actually need from attendees.
- Mobile layout: Review how the page looks on a smaller screen, including the form and registration button.
When you’re ready, click Deploy in the top-right corner of the builder. This publishes the page and gives you a live link.

7. Test registration before sharing the link
Open the published page and submit a test registration. Check that the form works and that the registration appears in your event workspace. If you’ve configured a confirmation email, check that too.
This is also a good time to open the live link on your phone. Read through it as an attendee would, from the event details to the final form submission.
Once you’ve checked the experience, your page is ready to share.
Update your page after publishing
You can continue editing through the same chat. Ask for the changes you need, review the preview, and click Deploy again to publish the updated page.
The Versions feature keeps earlier states of your work so you can review previous versions as you make changes.
Plan your invitations next
With registration ready, you can turn to the invite list. Explore AI Invite Management for your next step, or learn how EpochX connects event activity to your CRM.
Create your first event. If you get stuck, email jade@epochapp.com.
